
So you bought a stunning fleece at the fiber festival, and you DON’T want to wait months for a mill to clean and process it? You really can do this yourself, and it’s not as daunting as you might suppose. I use both hand cards & wool combs together to obtain lengths of “Combed Top” free of tangles, short bits, slubs or veggie matter. It’s very easy, taking longer to write descriptions than to actually process the fiber, leaving smooth wool buns ready to spin.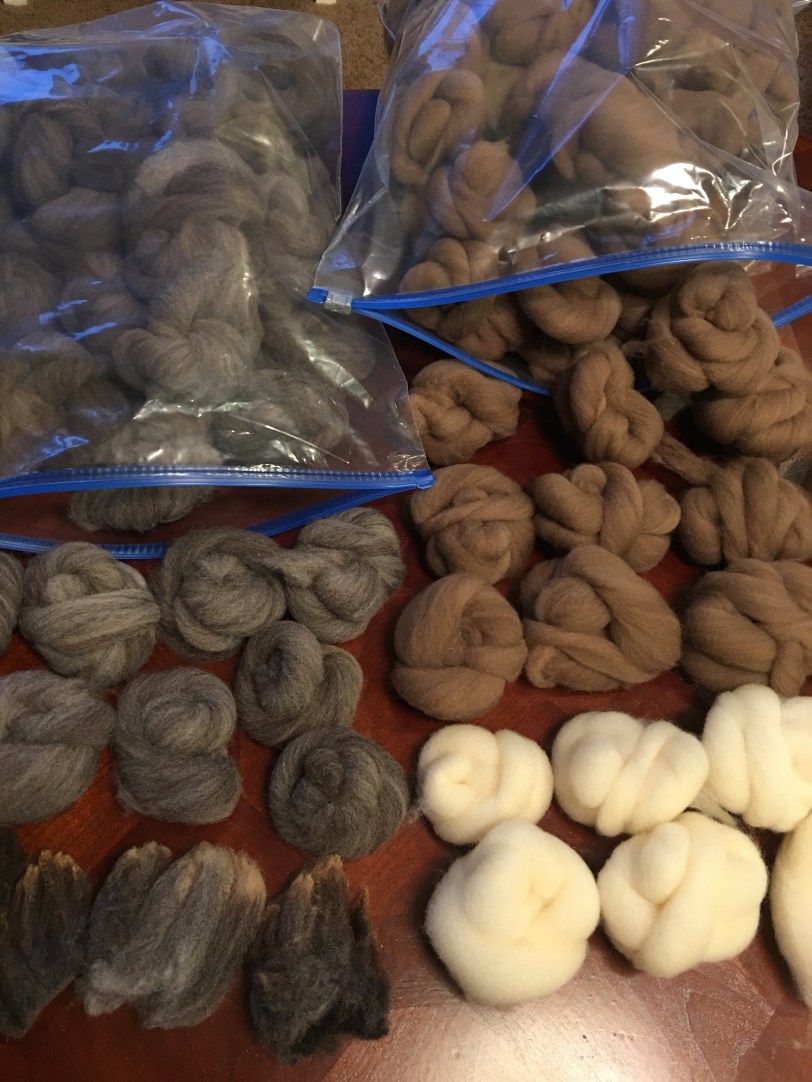 Lovely wool buns: grey CVM (Calif. Variegated Mutant), Romeldale in cocoa, and white Cheviot. All beautifully prepared and ready for smooth spinning.
In an earlier post, I wrote about STILL learning to wash a fleece. The same holds true for preparing the wool to spin. Techniques improve over time. Using these wool combs & 1 set of hand cards, I totally avoid paying a mill to process my fleece; instead washing & combing it myself into pretty “Combed Top.” I can process a whole raw fleece inside of a week.

Note: here are some websites showing how to use:
HAND CARDS – https://www.youtube.com/watch?v=SA8oCxLN7sQ You’ll see I do it differently.
DIZ TOOL – https://www.youtube.com/watch?v=v5BOP6sXBkM
WOOL COMBS – Honestly, I tried to find a good example for a link, but most were too involved, too much music, too much terminology, too crazy-making. The whole process just needs to be simpler. Yes, their ways also work… I feel my method works better.


HOW to obtain smooth wool instead of slubby wool? I figured it out back when I got frustrated trying to pull stubborn, stuck wool off the wool combs. Those gnarly big nail teeth do a wonderful job of culling out the slubby bits, but plenty of good fiber gets stuck with it, making a tug-o-war trying to pull off wool through the diz. There had to be a better way. Couldn’t I get rid of the tangles & slubs before combing? If so, how?
Start with hand cards. Do NOT pile jumbled wool atop the teeth. Separate the clean fleece, setting apart locks of wool, never mind which end. Line up wool locks on edge of cards. See below.


- Set hand cards atop a CUTTING BOARD in your lap. It helps to provide leverage, & protect your clothes.
- Press the wool locks half way on teeth / half off, giving a tug to help secure. Don’t overload. You’ll know if you do…
- Begin carding with teeth going only thru the fiber hanging off the teeth of bottom carder. Brush firmly. Never let each sides teeth interlock – only skim over each other. Here is where edge of cutting board provides leverage to pull down the top carder over edge, pulling and ‘brushing’ at the wool ends.
- You can even lay your hand on the lower card, to remind self NOT to brush there (see photo).

When bringing the top card back to pass again, overlap only the top & bottom fiber, not the metal teeth. Start near the tips – as you would with long tangled head of hair. Work your way up nearer the metal teeth. Flip and pass the wool from one carder to the other until all the wool has been combed. At some point, the wool hanging off the carder is smooth and – usually – slub free.

Finish a few brush passes and set down the carders. Grasp all the wool hanging off the teeth, or ~ if it’s heavy loaded, grasp only a portion ~ and holding firmly, gently begin to pull fiber out. Sometimes it helps to lift stubborn wool OFF the teeth, then lightly drag it over teeth again to comb out the slubs. Most of the debris and slubs remain within the wire teeth. DON’T LET GO OF WOOL YET. Check it first.

No need to struggle or pull hard. If wool doesn’t release easily, go ahead and lift off. Holding the clean end, lightly drag the slubby end over the teeth again to pull off debris or slubs.
- You should end up with a clean stack of what I call “Puffs.”
- You can spin directly from the puffs…..OR…..now switch to long-tooth COMBS to make a length of “combed top,” rolled into a bun and saved for later spinning.
- UPDATE: now I finally own a drum carder, I can feed the clean wool onto the carder – aligned, or not – and rapidly create a beautifully tidy batt.
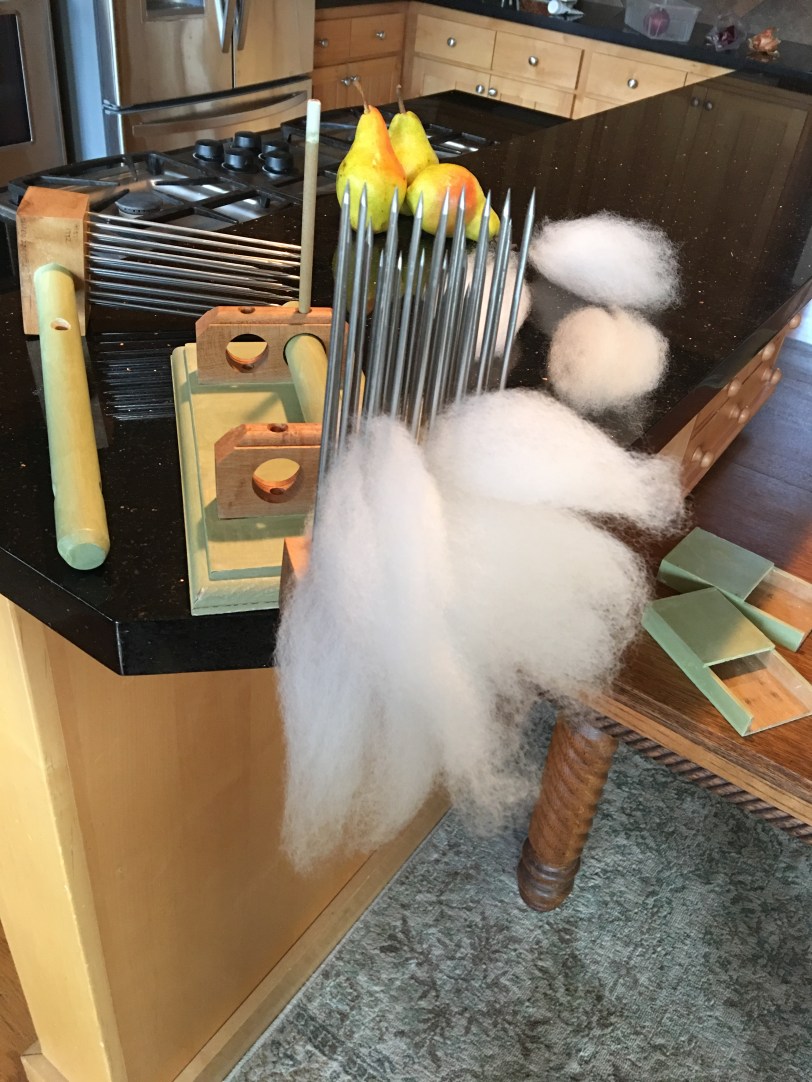 Gather puffs and stack some onto your wool combs.
NOTE: Though I haven’t attached it yet, I do clamp my combs to the counter. I have tried smaller, non-clamping combs but greatly prefer the security of a clamp and my hands free to work the fiber. Clamped combs also prevent wicked sharp teeth hitting your body (yup, done that) and provides stronger leverage when removing stubborn tangles.


Comb at least 3 or 4 passes ~ vertical & horizontal~ because if you don’t do this before pulling thru the diz, the ‘puffs’ later want to separate like flakes of a croissant. So, comb back & forth to adhere the wool fiber together. After diz-pulling your combed wool off teeth, give it a slight twist and roll around your hand, tucking the end thru middle to create a bun. Set aside to spin later.
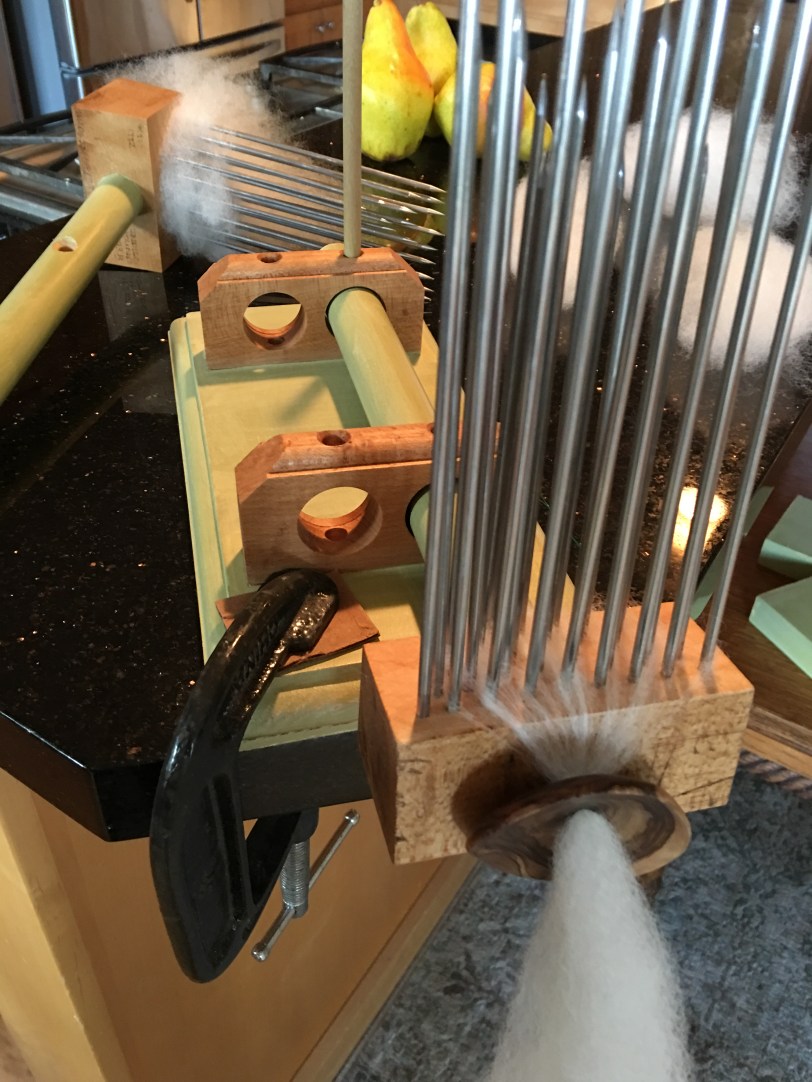 Notice how little wool remains at base of the combs – AND it’s free of short tangles or slubs. Held up to the light, you should see no debris remaining in your wool. Any wee bit remaining can be finger plucked out. (Aha, there’s the proper clamp for my combs.)

FYI: this combed wool holds it’s shape surprisingly well if you want to dye it. I have dyed UN-rolled buns in plastic wrap to steam, or placed it directly into a dye pot (light pokes only -no stirring). Handle gently to avoid felting. You will later lift out dyed lengths of combed top, still intact.
Practice this card & comb method a few times and you’ll quickly catch on, rapidly processing your washed wool into perfect combed top. HAPPY SPINNING to ewe all!
Edited to add: In case it wasn’t already obvious, save the slubs and shorty bits of combed wool. This scrap can be used in needle felting, even if only for the core. It can be added to drum carded fiber for texture, or dyed first for adding flecks of color. You can also tuck the scrap bits into a suet feeder cage and hang outdoors in spring for birds to use as nest material.
(years later Edited again) : when I *finally* got an electric drum carder, I used it preferentially – instead of using the big wool combs. I’ll fluff the locks of wool and feed it onto the drum carder. Then remove the wool batt, pull apart strips and STILL put it thru the hand carders to remove those slubs and tangles. Feed those tidy “puffs” right back onto the drum carder, either aligned with the rotating drum ~ for later spinning a worsted yarn. Or, aligned every-which-way to get a batt for woolen spun yarn.

Thank you! I have trying to find a simplified version of this, and this was perfect.
I’m so glad. I wrote a tutorial that I myself would have liked to find years ago when I was just beginning.
Thank you for showing this “double processing” as I am a college student my fiber tools are limited to pet grooming tools and I have been hoping to find something like this to use with the jumbled fiber I received raw as part of a fiber grab bag.
You are welcome! I’m glad if it helps you. With my first bag of fleece, all I had too was a wire dog brush. Being able to smooth out the wool into spinnable “puffs” made me really happy at the time. You know, you could dye a handful of your wool before -or after- you brush it. Just tuck into a big glass measuring cup (from thrift shop,and only for dye) with a glug of vinegar and some….oh Koolaid, or small pkt acid dye from Joanns. Then spin your colorful wool and have a grand time.
THANK YOU, THANK YOU! This is the best description of how to do this. I’ve struggled trying to do this (and although very fristr9) I kept with it and now have the technique down. You totally rock! 🤗
Thank you, Michelle, for letting me know my post helped you. I adore working with wool, and it took me some time to figure things out by experimenting. This particular method of using both hand cards & wool combs arose from my impatience to have the clean wool ready for spinning. I just didn’t care to wait until a processing mill could get it back to me. I wish I’d seen photos like mine ages earlier; it would have helped me too. So I’m extra glad you took the time to write. Much appreciated.
What would you do if you purchased roving that still had a lot of VM in it? Is it okay to re-card and comb?
Hi Teri,
Of course it is okay to comb the purchased roving. However, I’ve read that if you have processed wool roving – long lengths of wool off the mill machines – and it still have VM (veggie matter) bits in it, then putting it onto your drum carder is likely to further mash the bits into your wool.
In my opinion and in my personal experience – it’s best to use your hand carders (those paddles resembling wire dog brushes) to remove the debris. I lay the wool on and after making several passes, I grasp the “beard” end and pull off “puffs” of wool to set aside. Vegetable debris can then be knocked out / picked out of the carders.
You’ll get cleaner wool, but of course you’ll lose the long strand of mill processed form. Clearly you are seeking clean wool, and didn’t receive it clean enough. The good news is the simple process, and working on the already milled wool makes it easier to get thru the fiber. I’d set up to watch a nice program, drape a cloth over my lap / have a trash bowl and a basket nearby – – then have at it.
What then to do with all your clean “puffs” of wool? Options:
1.) Put it through wool combs (long nail-like teeth) and pull off new Roving, albeit in shorter lengths. That is my own preferred method discussed in this blog post. Works fabulous.
2.) Put them through your drum carder to make a batt
3.) Spin from the “puffs” of aligned fiber. Though this is more tedious for making all the joins as you spin.
Best wishes
Dana